Windows 10 finally brought back the Start menu, and it’s more customizable than ever. Here’s a quick rundown of all the different ways that you can make the Start menu your own.
Organize, Edit, Delete, or Add New Items to the Apps List
You can easily get to the Start menu’s folder structure on the hard drive to edit, rearrange, or even add new items. This also gives you the benefit of being able to search for these new shortcuts that you create. And yes, you can do this by dragging items around individually on (or to) the Start menu, but rearranging via File Explorer is much quicker if you have a bunch of things you want to change.
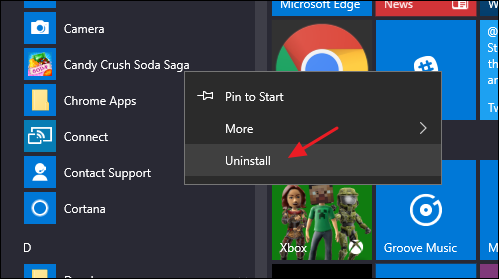
It’s worth noting that the Start menu folder won’t show Universal apps you have installed, so you’ll need to deal with those just using the menu itself. For the most part, you can uninstall any app—except for some built-in apps—by right-clicking them in the Start menu and choosing “Uninstall.”
Resize the Start Menu
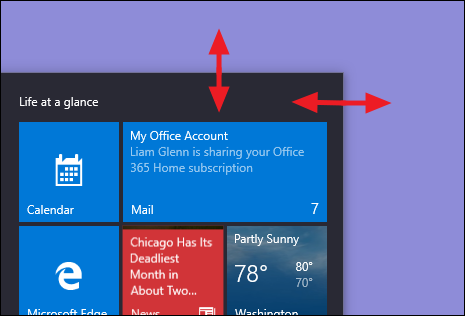
You can quickly resize the Start menu by dragging the top or right edge of the menu with your mouse.
Resizing vertically works just as you’d expect. When you resize horizontally, you can increase the Start menu by one full column of icon groups at a time—up to four columns. Unfortunately, you can only narrow the menu down to one column.


0 Response to 10 Ways to Customize the Windows 10 Start Menu
Post a Comment